Wednesday, July 3, 2013

No Bake 4th of July Jell-o Cheesecake


Today's post is just in time for the 4th of July. This recipe is an old favorite of mine from Ai. I modified the recipe a bit to make it fit with the classic red, white, and blue of the holiday. It's an easy and delicious recipe you can make year round. The only thing difficult about the process is waiting for everything to set! I used a tupperware jell-o mold to make this, but it would certainly be possible to just make it in a baking pan and just reverse the order of the layers. 

For the Jell-o layers


Start out with a 3 oz. box of blue jell-o and a 3 oz. box of red jell-o. You can use whatever flavor you want (like cherry instead), and change up the fruits to match the flavors. Then you need 1 cup each of fresh blueberries and sliced strawberries.

You're going to be using less water to make the jell-o. You need only 3/4 cup of boiling water and 3/4 cup of cold water. Make the jell-o like you normally would. 

Next you pour an 1/8 in. layer of jell-o in the mold and let it slightly set up for about 10 minutes. 


Add a little bit of the blueberries to make a nice pattern. 


While this first layer is setting up refrigerate the remaining blue jell-o until it is lightly set up. You want the jell-o to be somewhere between liquid and jiggly. Fold in the remaining blueberries and pour it into the mold. Let it set until firm for about an hour.


Repeat all the steps for the blue jell-o for the the red jell-o. 


The Cheesecake Layer

While the jell-o layers are setting up prepare the cheesecake layer. (Just a note here: the pics aren't going to match up because I made the cheesecake layer according to the original recipe. Because I used two jell-o layers instead of one, I only needed half of the cheesecake batter. I'll be writing the recipe up with the adjustments.) You'll need eggs, cream cheese, sugar, milk, and a packet of unflavored gelatin. 


In a saucepan mix together the gelatin and sugar. 


Mix the egg yolks with the milk and then whisk the egg mixture into the gelatin and sugar.


Cook on medium-low heat until the gelatin dissolves and the mixture thickens up a little. DO NOT LET IT BOIL. Immediately remove the mixture from the saucepan.


Whip up the egg whites until stiff and set aside. 


Combine the vanilla extract, salt, and cream cheese. Mix until smooth. 


Slowly mix in the egg mixture. The batter will be liquidy. 


Fold in the egg whites.


Pour the batter into the mold and let set in the fridge for about 10 minutes. 


Graham Cracker Crust

Mix together graham cracker crumbs, brown sugar, and cinnamon.


Add in melted butter.


Gently press the crumbs into the cheesecake layer.


Let everything set up for at least 5 hours. 

Enjoy the beautiful dessert! 

4th of July No Bake Jell-o Cheesecake

Ingredients

3 oz. box blue jell-o
3 oz. box red jell-o
1 cup fresh blueberries
1 cup fresh sliced strawberries 
water

1/4 cup sugar
1/2 envelope unflavored gelatin
1/4 cup milk
1 egg, separated
8 oz. package of cream cheese
1 teaspoon vanilla extract
1/8 teaspoon salt

1 1/2 cup graham cracker crumbs
1/4 cup brown sugar
1/2 teaspoon ground cinnamon
1/3 cup melted butter

Directions

1. In a medium bowl, stir blue jell-o with 3/4 cup boiling water until jell-o is completely dissolved. Stir in 3/4 cup of cold water.
2. Pour 1/8" layer into 6 cup mold. Refrigerate until almost set, about 10 minutes.
3. Arrange a few blueberries on jell-o layer to make a pretty design. Refrigerate until set. 
4. Refrigerate remaining jell-o until almost set. You want the jell-o to be in a state that is still a little liquidy, but chunky when you stir it.
5. Fold in remaining blueberries. Spoon into the mold and refrigerate until firm.
6. When blue jell-o layer is firm, repeat steps 1-5 for the red jell-o.
7. While jell-o is setting up, in a 2 qt. saucepan mix the sugar and the gelatin. In a cup with a fork beat milk and egg yolk until blended. Stir mixture into gelatin.
8. Cook over medium low heat, stirring constantly, until gelatin is dissolved and mixture coats the back of a spoon (DO NOT BOIL). Remove from saucepan.
9. In a small bowl beat egg whites until stiff; set aside. Beat cream cheese, salt, and vanilla extract until smooth. Gradually beat in gelatin mixture until blended. Fold in beaten egg whites. Pour into mold and let set for about 10 minutes.
10. In a small bowl combine graham cracker crumbs and cinnamon. Mix in melted butter until well combined with the crumbs. Gently press crumbs into the cheesecake layer. Let everything set up completely. At least 5 hours; preferably overnight.

Just a note about the recipe. The original recipe only calls for one layer of jell-o and double the amount of cheesecake batter. I just wanted to make the recipe festive and opted for two different colored layers of jell-o. This recipe is easy to play around with and you can use any combination of jell-o flavors and fruits. Hope you all enjoy and have fun with it! 

That's all for this week folks! Happy crafting and baking! ♥  

Don't forget to follow us on SugiAi
Sunday, June 9, 2013

DIY Cute Baby Shower Magnets


A really good friend of ours had a baby shower recently, so we've been busy bees and made a bunch of fun stuff. Pinterest is a gold mine for making simple and cute gifts for a baby shower. Be careful about getting too caught about with all the different tutorials. It's really easy to get lost in the sea of pins and keep on making stuff. 

Today's post isn't actually from Pinterest. Ai made these cute magnets for our friend and her husband, so she decided to make a new set for their new addition. Making your own magnets can be easy and fun. You can check out this previous post to find out how to make your own. 

The magnets came out super cute! I think they make a lovely addition to the other magnets.

The baby magnet came out incredibly adorable. 

That's all for this week folks! We made so many different things, that we have to break all the posts up. Also be on the lookout for our video tutorials. We already set up a Youtube account. You can subscribe here. We don't have anything up yet, but we're working on producing quality tutorials. We should have some stuff up within the next month or so. Happy crafting and baking! ♥  

Don't forget to subscribe to SugiAi

Saturday, May 25, 2013

Harry Potter Craft Downloadables


I have some fun Harry Potter downloadables for you. There's the Hogwarts acceptance letter and envelope, labels for wand boxes, candy labels for Weasley's Wizard Wheezes, and some other stuff. All of this stuff is free to use as long as it's not for profit. 


To get the aged look on the paper and envelope I coffee stained everything and immediately dried the paper with a hair dryer. Also you may need to iron the paper so it's smooth for the printer. To do this take a hand towel and place it over the paper and iron  like normal. The letter is meant to be printed on a standard 8.5" x 11" piece of paper and then cut in half. The envelope is an A2 Baronial 4 3/8" x 5 3/4". In order to get the font right, you need to download the MAGIK font from here. You'll probably need to adjust it a bit because Google Docs reformatted the letter since magik is a special font. 

The front of the envelope

For the back I made "wax seals". Make sure to print on red cardstock or whatever color you want. 

I looked in the book so I could hand sign McGonagall's name


I made candy boxes out of cardstock. Just look on pinterest for some tutorials. I used a giant shoebox to put all the candy boxes in and labeled it a Skiving Snackbox. 


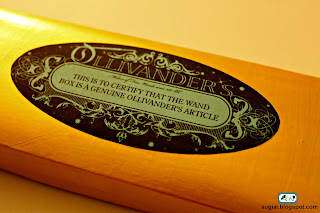
I made the number labels for the wands myself and the Ollivander's label I found on the internet and printed on blue cardstock. 


I also made my own owl post stamp. I got the owl vector from deviantart. 

Alright on to what you've all been waiting for. Everything except for the envelope is meant to be printed on 8.5" x 11" paper. Everything is free to use as long as you don't use them for profit. 


That's all for this week folks. Hope you enjoy using everything and it would be awesome if you sent us pictures of the things you make. Happy crafting! ♥  


Don't forget to follow us on SugiAi

Thursday, May 9, 2013

We Were in a Book! We need your help to win a contest!


About a year ago there was an open call going around asking for people to submit their costume and cosplay photos. We decided to take a chance and submit a few things and one of our costumes ended up in the book! The book is called 1000 Incredible Costume and Cosplay Ideas. It was put together by Joey Marsocci aka Dr. Grymm, Allison DeBlasio, and the Queen of Cosplay Yaya Han. If you're interested in seeing some really beautiful costumes or if you're into cosplay you should really check the book out!

 Here it is! The costume was in the section of original characters! My sister was so excited to see herself.

Here's the original picture. 

Before we sign off, we need your help! We entered a contest that is voting based and we need all of you to vote so we can win. You do have to have a facebook to vote. Please vote and help spread the word! Thanks! We love you all! ♥  Go here to vote for us!

That's all for this week folks! Hope you all are getting ready for the summer! Happy crafting and happy baking! ♥  
Don't forget to follow us on SugiAi

Saturday, May 4, 2013

Harry Potter Paper Craft and Other HP Goodies


A dear friend of ours is now officially a dentist and that means she'll be moving away in a month. She's a fellow Harry Potter nerd and we decided to go all out and make her a bunch of cute little things as a graduation present. We had so much fun making everything and she absolutely loved it! 

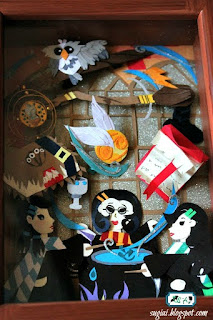
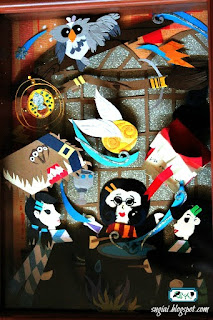
 Ai made her the most beautiful paper craft shadow box and a cute little Harry Potter cube key chain. I made  her an acceptance letter, a wand (here's the tutorial to make your own), and a little door hanger for her office. 

The shadow box is just so gorgeous! 


The detail on all the little pieces is so amazing! 


We did the Pottermore thing so we could get officially sorted. Ai ended up in Ravenclaw and I got placed in Slytherin.

The key chain was made out of felt and stuffed with fluff. It's so cute! 

All the goodies together! 

We found the cutest box at Michaels! It's shaped like a suitcase and had a very Harry Potter feel to it.

That's all for this week folks! We hope you're inspired to go out and make some of your own nerdy crafts! Happy crafting and baking!♥  
Be sure to follow us on SugiAi

Sunday, April 28, 2013

Monkey Baby Shower Cake


We made a beautiful monkey themed baby shower cake this weekend for a friend! Now monkeys can be pretty tough to make look right but Ai did a phenomenal job! Her monkeys came out incredibly sweet and super adorable! 

The cake was a wonderfully light yellow cake made with this recipe! You must follow the recipe to a T and be sure to whip it for the whole 3 minutes. The cake just comes out absolutely fantastic and has a really nice crumb.

The filling was a light vanilla custard layered with fresh strawberries and blueberries. I made the custard by hard whipping one cup of cream and folding it into this vanilla pudding recipe. It's my go to custard recipe and is super easy to make!

Now let me talk about the frosting. I've always loathed American buttercream because it's overly sweet, heavy, and not smooth enough. I'd always heard that Italian buttercream was superior but a little worried about making it. A few months ago I decided to go ahead and finally try it and all the work was definitely worth it! I used this recipe and it was just a dream! Ai and I have an unhealthy love for butter (we don't eat it very often, but when we do we really go for it!) and if we could, we'd eat the whole batch of buttercream together! Make sure you follow the recipe very closely. It's not too difficult, but takes a lot of patience to get just right.
Finally, the decorations were made using our usual marshmallow fondant.

We're so proud of how this cake turned out. It's definitely the best cake we've done so far.

The baby monkey is just so cute! 

The mama monkey is a classy gal! 

Daddy monkey is just as adorable as baby! 

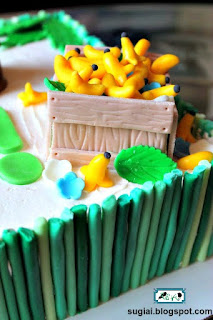
We had a lot of fun making these wooden cakes filled with bananas!


That's all for this week folks! We hope that you all are inspired to make your own beautiful monkey themed goodies! Happy baking and happy crafting!♥  

Be sure to follow us on SugiAi